This is an old revision of the document!
Problems during Updating
Indication
If the update of your database running on an error or do you have to experience problems with Admidio so describing your problem to check out our Forum. The procedure described here will help further only with serious problems that can on the one hand be due to a change / update your database by your hoster (eg change of MyISAM on InnoDB was) or triggered by a faulty update of earlier Admidio versions. Before you apply this procedure must first be clarified whether this possibly is not an error in our update script, otherwise the error will occur again, even with the described procedure.
Preparations
With the procedure described here, we build the database structure of your current version before upgrading to completely new, then play your data again and thereafter again the update to try again to the new version.
- For this purpose, you should, as with all adjustments to the database, before making a full backup of your Admidio database. If you run in trouble you can rely on this backup.
- Next, you should download Admidio again in your currently used version of our Sourceforge project page. These are here, however, only in the most recent bugfix version available, which should be no problem, however. This version can unpack you anywhere locally on your hard drive. We now need the resulting file, you can take in mind for later access:
www.your-admidio-folder.org/adm_program/installation/db_scripts/db.sql - In the file, we need to make only a small change. All % PREFIX% must be replaced by the table prefix that you have specified during the initial installation. Just take a look in the database to which Prefix start the tables. Our default prefix is adm , then the tables are called, for example, adm_announcements or adm_files.
Update database structure
Now we will update the database structure of your Admidio installation. We will describe the further steps using the software phpMyAdmin. Of course, these can also be done with other database software.
The following things must now be done one after the other:
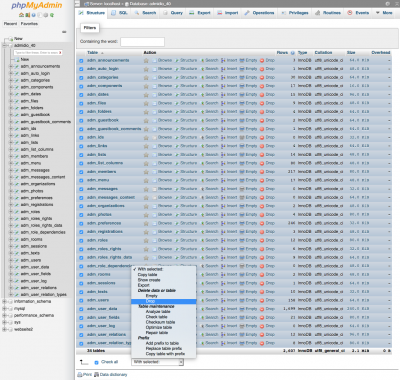
- Next, you should now delete all existing Admidio tables in the database with an appropriate program (in this documentation phpMyAdmin). For this you mark the appropriate tables and choose entry Delete.

- Next we import the database structure from the file db.sql, which we have saved in the preparations. To do this, select the db.sql file from the hard disk under Import and confirm this with OK.
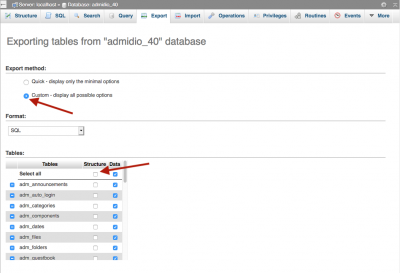
- In the next step we now import the backup from point 1 again. This is also done with Import.
- If both imports went through without errors, you can now place the new Admidio version on your web server and call the update dialog
www.your-admidio-folder.org/adm_program/installationagain here and perform the update.
Now the update should run without errors. Are there still problems so please consult our Forum.
Much success!


